disable right click

Sunday, 10 November 2013

Applique Work


Applique work is such a versatile work. It is a technique where patches of fabrics are stitched on to another base fabric to create a design. The pieces of the fabrics are cut according to the shapes of the design chosen and then it is stitched on to another fabric using some decorative embroidery stitches.  

Geometric and floral patterns are used. Once you have mastered applique work you can be more self expressive, use your creativity to create more different patterns and effects. This technique can also be used to hide the flaws in a fabric. Applique work can be done by machine or by hand.

Velvet paisley motif 
appliqued on georgette
fabric

Velvet appliqued on net with crystal work done on it


Materials Required for Applique Work


  • Sharp scissors
  • Material for background and also for the design to be appliqued on the background fabric
  • Stainless steel pins
  • Embroidery Needle
  • Embroidery Thread

How to do Applique Work ?

1) The first step in applique is to decide and select a design. The next step is to decide on the technique you will be using to secure the applique to the background fabric i.e, either through hand or my machine. Then select the material for the background fabric. 

2) Take the material which has to be used as the design and has to be appliqued on the background fabric. Draw the selected design on to this material. Draw seam allowance of about 1/2" to 1". 


Motif to be appliqued is drawn with seam allowance 


3) Cut the design out leaving seam allowance for machine.

4) Now that the cut design applique piece and the background fabric is ready you can start pinning and basting the applique piece in place on the background fabric. 

5) Stitch with a series of running stitches or whip stitches or by machine do satin stitch. 


Image of the cut motif appliqued on the background fabric


6) Finish the corners of the background material to secure edges. 


'Om' Symbol appliqued on a georgette fabric and outlined with crystals


Velvet fabric appliqued on net and other types of embroidery done on it


Velvet appliqued on net with crystal embroidery done on it. This is a neckline design. 


Products where Applique Work is used


  • Kurtis
  • Lehengas
  • Sarees
  • Blouses
  • Anarkali and salwar suits
  • Western gowns
  • Table cloths
  • Purses
  • Bags
  • Curtains
  • Chemise
  • Pillows and pillow covers
  • Bed covers
  • Lamp shades and lots of other products

Friday, 1 November 2013

Sequins Embroidery


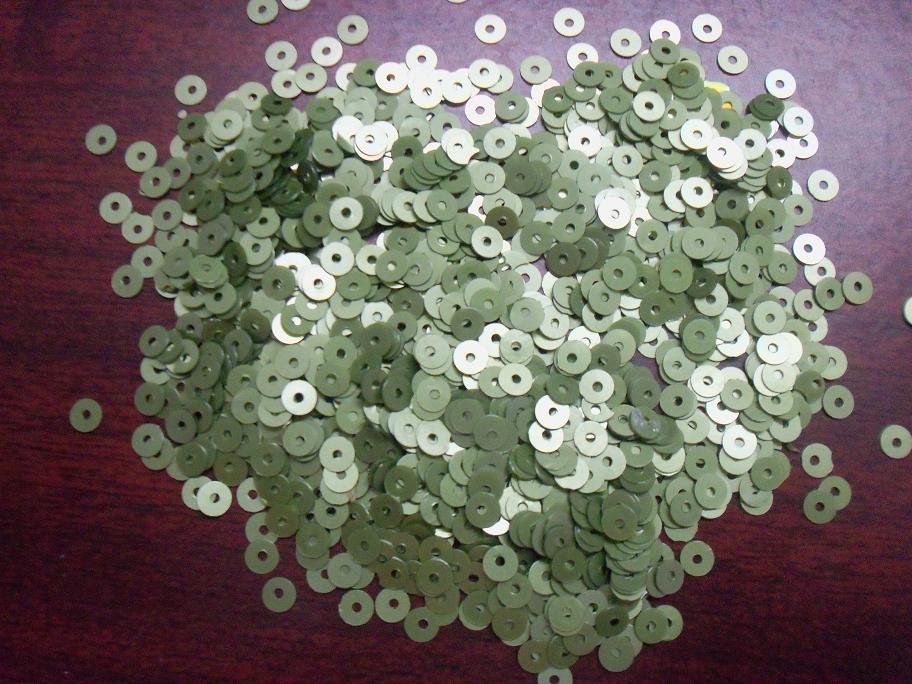
Sequins embroidery is a very beautiful and traditional embroidery work used for garment surface ornamentation. Sequins are any flat disc shaped material which are sewn on to the fabric for decorative purpose. I use sequins embroidery in wide variety of my designs including Indian, Indowestern and Western clothes and accessories too. There are wide varieties of sequins available for embroidery in different shapes, colors, sizes etc. In the below contents i have shared with you images of different types of sequins, different types of sequins work, beautiful products ornamented with sequins work, technique of attaching sequins on to the fabric and much more. 


Different Varieties of Sequins

As I have discussed before there are various types of sequins available in different sizes, shapes, colors etc. Different types of sequins like Ubaick, Katori sequins, rainbow sequins, devdas sequins, pani(water) sequins, matt sequins, tear drop sequins etc are used in varieties of clothing and accessories.


Matt sequins are opaque and are available in solid colors. Transparent sequins as the name says are transparent, it shines and takes the color of the base fabric on to which it is stitched and these are also called as pani sequins. Metallic sequins look like opaque discs in metallic colors and are used for material work. Rainbow sequins and devdas sequins shines in multi colors. There are sequins which shines in two colors too. There are katori sequins which are 3D in appearance. Sequins are available in various thickness.


Images of Various types of Sequins


Attaching sequins

There are number of ways of attaching sequins to the fabric. The thread will be visible to some degree and so to be selected carefully to match or contrast in a decorative fashion. As the thread will be repeatedly pulled through the sequins the thread should be strong and durable. Always work from right to left.

Back stitch, Double stitch, Simple running stitch can be used to attach the sequins.


 1) Insert the threaded needle from the wrong side of the fabric through the fabric and bring it to the front of the fabric.

2) Thread on a sequin through the hole at the centre of the sequins.

3)Bring the needle down at the edge of the sequins to the wrong side of the fabric.                                                 

4) Leave a stitch gap and insert the needle again from the wrong side of the fabric through the fabric and bring it to the front of the fabric and thread on another sequin.

5) Do the back stitch by inserting the needle down through the fabric at the same point where the first stitch ends(at the edge of the first sequins) and bring the needle up again leaving a stitch gap and continue doing the same steps until you finish the design.


Heavy Sequins work at the edges of a georgette dupatta


Here the sequins work is combined with other embroidery work such as stone work, bead work etc. This embroidery sample from cbazaar.


Sequins work done on a beautiful chiffon saree


                           Gold and silver seqins are used along with small sugar beads


Heavy embroidery using sequins and other embroidery work on a georgette fabric


Sequins work on neckline design


This sequins is similar to tear drop sequins but they are pointed at both the edges. This is a neckline design of an Anarkali. I just clicked the image before cutting and sewing the Anarkali.


Sequins embroidery border on a net dupatta


                 Embroidery border and scatters is done using sequins.


Sequins embroidery border combined with other embroidery work


Sequins work done using machine

Sequins work is also done using machines and computerised technique which is fast and easy. There are needles and different sewing machines available to sew the sequins on to the fabric. This is less expensive compared to hand embroidery and is much useful when it comes to mass production.

Images of machine and computerised embroidered sequins work


Black Sequins Border


Border with Silver Katori Sequins


Monday, 30 September 2013

Tie and dye

Tie and dye is one of the techniques of creating a pattern or design on the fabric using one of the resist dying methods where the fabric is tied in the appropriate manner required for the design and then dyed to create patterns. The portion of the fabric which is tied does not take the dye and the rest of the fabric gets colored thus forming the design. 


This technique is seen in most of the parts of the world. In India it is also called as 'Bandhani'. Lots of variations are done in tie and dye techniques to create variety of designs. 


Tie and dye designs and techniques

The most popular design in tie and dye is circles like design or pattern. A very tiny portion of the cloth is picked and tied tightly. So as said before the portion of the fabric which is tied does not take the dye and the rest of the fabric gets dyed forming white circles kind of pattern. 


This technique can be used creatively to form different unique patterns. Apart from the circle shaped design lots of other patterns are produced by various methods like the following


  • Folding the fabric like a square and tying only lengthwise or lengthwise and widthwise tightly


  • Folding the fabric like a square and machine stitching on it in different patterns like straight lines, diagonal lines etc. In this case wherever the stitch is done the dye does not penetrate. 


  • Crushed effect can be obtained by simply crushing the fabric; tying it randomly and dyeing it. 


  • Different sort of designs can be produced by tying the fabric with some objects inside it for eg rice and then dyeing it. 


  • Four corners of the fabric can be knotted and dyed. 


  • The fabric can be folded like a square or rectangle and the four corners of the square or rectangle can be tied and dyed. 


Images of some tie and dye samples


Square fold tie and dye


Tie and dye with object inside(rice)


Tie and dye with object inside(rice)


Crushed effect


Wrinkled effect


These are few tie and dye methods and you can however be very creative and make your own interesting designs. Synthetic dyes are mostly used in these days. 


Applications

Tie and dye is widely used in almost all types of apparels, home furnishings and accessories. Products where tie and dye technique is applied includes shirts, kurtis, salwars, sarees, anarkalis, dupattas, stoles, shawls, women and men's tops, skirts, scarfs, jackets, bags, shorts, leotarts, women's dresses, wall hangings, swim wear etc. 

Again creativity plays a very important role here. You can be very innovative in applying the technique in different products. There is no hard and fast rule that you have to apply a particular technique in only a particular product. As long as the design is pleasing and the product is usable it is perfect.


Sunday, 8 September 2013

Batik

Batik is also one of the resist dyeing methods and here melted wax is applied on the cloth according to the design and then it is dyed. The dye will not penetrate the portion of the fabric where the wax is applied and the rest of the fabric will get dyed and thus forming the design.After the dyeing process is completed the wax is removed from the fabric by immersing the fabric in boiling water where the wax melts and gets removed. 


In the above image the white or off-white portion is where the wax was applied before dyeing. This is not my best work. This is just to show you what is batik. You can see some crackled effect in the design which is the characteristics of batik.  

                     
How to do Batik?

Things needed for Batik

  • Melted wax 
  • Fabric : Cotton, silk. 
  • Tijanting needle: This needle looks like a pen and is used to apply wax on the fabric. The needle has a wooden handle and one or more spouts. A brush can also be used to apply the wax. 


Sketch of a tijanting needle


  • Wooden frame 
  • Dyeing bath

Pre-preparation

Before commencing the work the fabric is washed thoroughly to remove impurities and then boiled in water to preshrink it. 

The technique

1) The fabric is stretched on the wooden frame firmly and the design is traced on it. 

2) The melted wax is poured into the tijanting needle and the wax flows through the spouts. The wax is applied in fine lines over the traced design. If brush is used, the same is dipped in the wax and then the design is drawn. 

3) When the wax dries completely the fabric is dyed immersing it in the dyeing bath. The process is repeated if many shades are required. 

4) After dyeing the fabric is rinsed well and boiled in hot water to remove the wax. 


Applications

Batik technique is applied in various products like women's dresses, caftans, skirts, T- shirts, bags, purses, beddings, pillow covers, wall decorations, table cloths, bedspreads, scarfs, wrap skirts, shirts, lounge wear pants etc. 
                                                

Friday, 30 August 2013

Introducing textiles


I am introducing the next category in my blog which is 'Textiles'. According to wikipedia 'Textiles is a flexible woven material consisting of a network of natural or artificial fibres often referred to as thread or yarn'. Now in my blog i am not going to go deep into the technical details about the manufacturing process of fibres, yarn or fabrics. This category 'Textiles' is all about textile designing and about various fabrics, its types, applications, properties etc. Here is a brief note about textiles and its types. 

The raw material for the textiles is fibres. Fibre is the smallest unit of fabric. Fibre can be broadly classified into two types Natural and Synthetic fibres. Fibres gotten from the natural resources are natural fibres and those that are manufactured by man artificially are called synthetic fibres. 

Natural fibres can again be from
  • Plant origin examples are cotton, jute, flax, coir etc
  • Animal origin examples are wool, silk etc
  • Mineral origin examples asbestos, glass fibres etc
Synthetic fibres are produced by man artificially and examples are polyester, nylon, lycra, aramid, acrylic etc. 

These fibres are spun into yarns and yarns are made into fabrics. Depending on the methods used to make the yarns or fibres into fabrics, the fabrics can be classified as 

  • Wovens: The sets of yarns are interlaced at right angles with each other by hand or by machine.  The lengthwise yarns are called warps and the width wise yarns are called wefts. Examples brocades, banarasi, georgette, chiffon, satin, handloom fabrics etc. 
  • Knits: The yarns are interlooped with each other. The knitted fabrics have more elasticity. Examples sweaters, socks, lingeries etc. 
  • Nonwovens : The fibres or yarns are bonded together by using chemicals or mechanical methods, by using heat or solvent. Example felt. Braiding is also one of the method.  
Once the fabric is formed it is called as grey fabric when a suitable finish has to be given to it to make it a finished fabric. The fabric is then dyed to the required color. Dyeing can be done at fibre stage, yarn stage or the fabric stage depending on the requirements. Patterns or designs on the fabric can also be done using dyeing process. Tie and dye, batik are examples.  If printing is required it is done using different methods like block printing, stencil printing, screen printing ,roller printing etc. After the suitable finish is given the fabric is now ready to be made into finished products like garments, home furnishings, accessories etc.